
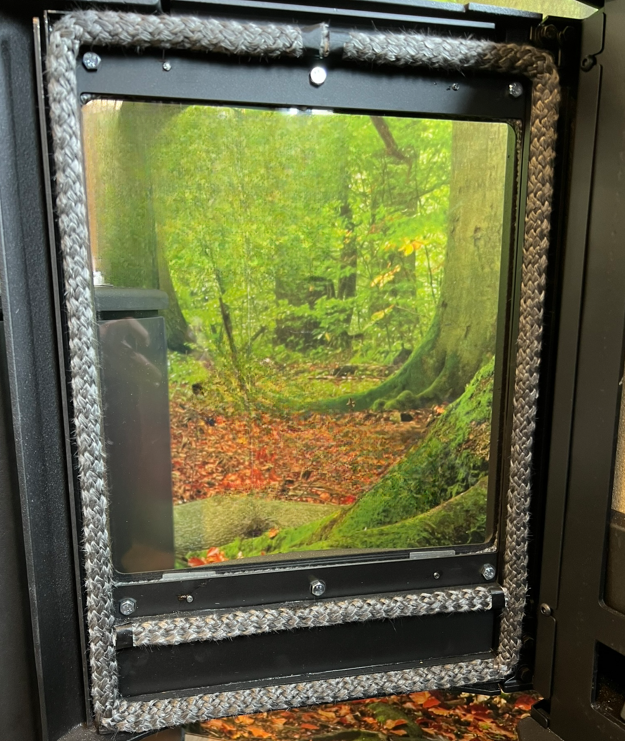
Ensuring your woodburner operates at its best means regular maintenance, especially when it comes to often overlooked components like the rope seals. A compromised rope seal can lead to inefficiency, overheating, and even dangerous fumes in the home.
Thankfully, replacing rope seals isn’t as tough as it sounds; it’s a DIY project most can tackle. So if you’d like to try, here’s a step-by-step guide to help you keep your woodburner in peak condition.
Knowing What You Need
Before you start, gather the necessary tools and materials. You will need:
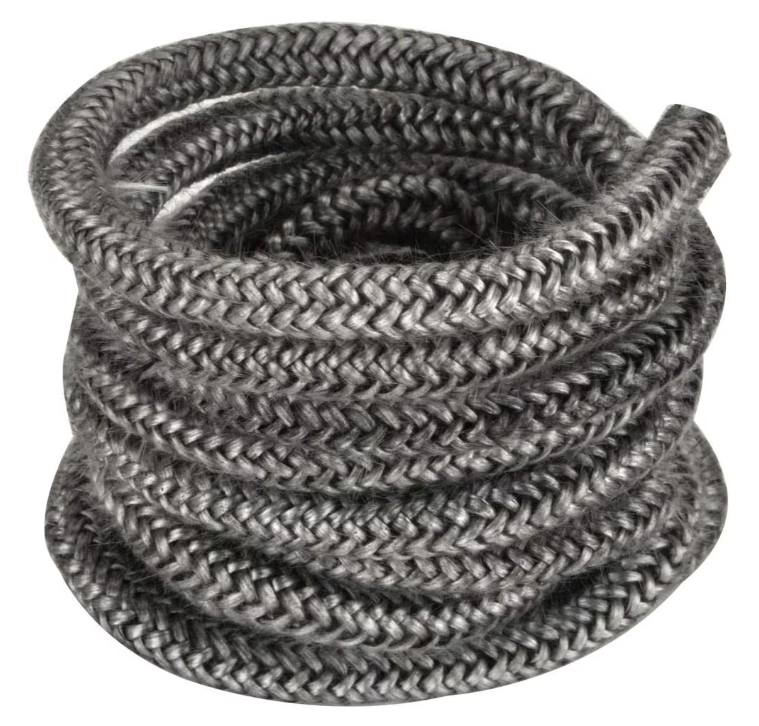
- Suitable rope in the correct diameter and length for your wood burner – this is critical
- High-temperature rope adhesive (not fire cement)
- End sealing tape
- Scissors
- Stiff wire brush
- Gloves
Choosing the Right Rope Size
Selecting the right rope size is crucial. Even if you know the required diameter, different grades of rope can exist and some ropes are made specific to the stove and stove manufacturer. So, it’s best to stick to the manufacturer’s recommendations. If you’re unsure or your manual doesn’t state which rope is required, contact a registered parts dealer for your stove. Have the serial number, make and model of your stove to hand to help identify the correct parts.
Preparation is Key
- Wait until the stove is fully cooled.
- If possible, remove the door/s and lay the door/s on a flat surface.
- Use gloves and a stiff brush to remove the old rope, and clean the area, ensuring it’s free from old adhesive and debris.
- Bind just one of the rope ends with the End Sealing Tape.
- Shake the adhesive and familiarize yourself with the instructions.
Replacing the Rope Seals
- Apply a bead of adhesive in the rope channel on the door.
- Begin with the bound end and work the rope around the door without stretching it.
- Bind the loose end with the tape and fit it in place.
- Press the rope firmly against the door and leave it to set as per the adhesive’s instructions.
Putting the Doors Back On
- After the adhesive has set, replace the doors, ensuring that the doors fit well by adjusting any door locking mechanisms. This may be a good time to oil and clean hinges as well.
- Light the stove and heat it gently the first time by building a small fire.
Remember, when in doubt, contact the manufacturer for specific advice or consult a professional. And if you’d rather not try this project yourself, give us a call to schedule your next sweep & service.